Pages

Our Geo-Board

How to Make & Play with a Geo-Board


Geo = Geometry, So as you may already know Geo Boards are a hands on way to learn about shapes & Math. I made this for my son & it will eventually be accompanied by a water wall, they both will one day be part of an Awesome tree house.


How to make a Geo-Board:
You will need a large wooden board or similar, we found this piece stored in the shed & it is suitable for outdoor use but if you were using it inside you could really use any type of ply or chip board, This piece we have is a thick & sturdy rectangle that can get wet, as it is very thick I imagine it to last a while.
Make sure it is thick enough to hold nails firmly, they need to go in til they're at the back of the board so they don't bend or get flung out with the pressure of the bands & kids pulling at them.
You also of course need nails, a hammer (& if you want to do it properly a ruler & a pencil to mark where you will put your nails evenly, I didn't do this & i should of, I just did it from eye sight & some are a little of centre).


Get your board & rule where you want your nails, put a dot & rule the same length for the next dot, continue until you have a graph of evenly spaced and evenly distant dots & start hammering.  Nail in your nails until the hit the back of the board. If you are using the board by itself & not nailing it to a tree or cubby make sure you nail them in without going through the back, other wise the spiky protruding nails will pose a dangerous hazard for little fingers & will damage whatever surface you hang it. Nails of the same size, height & width should be used so that the geo board is even. Nail them in with a centimeter or 2 hanging out the front so that the bands can fit around them & make sure your graph, and spacing is wide enough so that little fingers or hands can fit between them to take the bands on & off.

There you go. It is easy, just a little time consuming.  Get a packed of coloured rubber bands from your office stationery supplier and your ready to play.

How to use your geo-board:

Make shapes: Basically the only shape you can not make is a circle.
My little man has learnt Triangle, Square, Rectangle, Diamond, Octagon, Hexagon.

What shapes make a Square? He learnt that 2 triangles are in a square or 4 small squares. 
 2 Squares next to each other make a rectangle.
There are lots of small triangles in this triangle below.
If you have an older child they can go further with, what types of triangle.
If you had  a school age child you could again go in depth about the Math and angles in different shapes. Eg; Make a 90 degree angle, where is a 45 degree angle, 2 x 45 degree angles make a.....? & so forth depending on the level your child is at.
My little monkey is 2 yrs and he is learning how many sides are on triangles, hexagons, Octagons along with identifying different shapes and the different colours of the bands.
Further use: Big vs small, Colour recognition, Shape recognition, Basic math, Fine Motor skills for making shapes, focus & attention.


The idea of using different colour bands is so that they can clearly see whats what when you do overlapping like in this triangle above.
Make sure you warn your little one of the flicking, flinging nature of rubber bands so that they don't over stretch them & hurt them self's if the snap or fling back.

Halloween ideas for little ones to enjoy

How to Celebrate Halloween with the Under 4 yr old.

We don't get into Halloween as much as Americans for obvious reason but I love it! I have great memories of trick or treating when i was young but here in Australia a lot of old fogies don't like the concept of Halloween and refuse to answer their doors for trickers going around. I clearly remember when I was 12 we did our usual knock - knock trick or treat and an old lady screamed violent abusive language from her rocking chair, banging her walking stick on the wall and yelling that she wasn't American and doesn't believe in it.... Fair enough but Geez, we avoided any house from there on in that we knew had elderly persons living there.  Besides that incident,  I love the spirit of Halloween and think it is one of the funniest Holidays of the year BUT my son is not yet 3 yrs old and a little young so I thought of some more appropriate ways to teach him & get him involved in the tradition.

So What do you do with children who are too Young to go trick or treating, or in the example above for younger Australian kids who you want to shield from such negative reactions and for those who are too young to understand the concept of Hallows eve?
Well here are some ideas we came up with.......

Surprise Trick or Treat at family & friends houses:
We will still go trick or treating but more as an excuse to visit family & friends in dress up (Shhhhh they dont know this yet & will be completely un-suspecting of who the little trick or treater knocking on their door really is).
We plan to visit grandparents, Aunts uncles & close friends, of course Mummy will probably be dragged to every door for the surprise but it will be a nice surprise for our loved ones and it gives us a chance to stop in for a chat, S gets to dress up and join in the fun, we get to take some family pictures along the way & all in all it will be a fun learning experience that will provide some good laughs in the future & maybe some embarrassing 21st photos to hold on to for when my little one is all grown up  ;-D

Halloween Decorations:
Great for FUN, great for Guests, parties or to Welcome trick or treating children.

We were having a guest over so we decked out the entrance with spider web & streamers.  My little boy was running around frantic, so excited saying that he was running from the spiders & he had a ball looking at the spider webs while he waited near the door for one of his best friends to arrive & when she did it was  "Look look" -  I think i will leave the decos up on Halloween in case we do get some trick or treaters. Were I grew up there were a lot of children roaming the streets in cool costumes & we did know what we were celebrating but where I am now, I have lived here for years  & only ever had 2 lots of tricksters come to the door
(Most of them didn't know what to do when i asked for their Trick, they just looked at me blankly as if to ask where the lollies were)


We especially did the entrance, this big web & spider was on the door.
I used a non stick tack dot to stick the streamers up so that they wouldn't wreck the paint & hung fake spiders/scorpions and Bats through the web. Most toy shops have an abundance of supplies that will give you some great ideas.

Most of it got run through ripped and torn down by the end of the evening but my little man & his guest did enjoy it, maybe a little too much!


I also used non-stick reusable stickers of spiders and webs that i got from the local bargain shop. These will stay on the walls also in case some older kids come door knocking on Halloween.


Food ideas & Recipes:

Bat sandwiches

Bat shaped Sandwiches (I used a Bat cookie cutter You can also get pumpkin or ghost shaped ones that would work just as good) Nothing spectacular but they were gobbled up first, we just had Vegemite ones and Devon/sauce ones seen as it was only ourselves and another close friend.

Eye balls on Slime

These are canned, pitted Lychee's stuffed with strawberries on blue jelly.  I hadn't tried my little one with lychee's before and seen as our kids are so young and sometimes fussy I did this more for the cool look, they were intrigued and picked a little but i am unsure if they actually ate a full one. My mates little angel loved the slime (jelly) and thought they were pretty weird looking so I succeeded in that department!
They would look great stuffed with green Olives also.

Mummies dipped in blood

Continental Frankfurt's mummified in thin strips of puff pastry & baked, served with tomato sauce.

Gruesome Floating hand Punch
In a doctors glove, or a clean un-dusted plastic glove fill it up with water and add a drop of food colour, tie the top up then freeze it for at least 12 hours.
Then as your guests arrive make the punch. Because our ones are still babies we used a natural fruit juice (apple & guava) diluted with water.  I also had a ice tray of star shapes so i did some black stars.
You could put fruit in as well or normal ice cubes.
At the last minute get your frozen hand & cut it from the glove, make sure there is no plastic left on it & be careful not to break the fingers off (like i did).
There you have a floating hand. The colours do drift into the juice quiet quickly as it melts so it is better to use high contrast colours & place it in quickly to that  it isn't left melting in the glove as you hold it :)


Other ideas I had - 
 Witches fingers in green snot  (aka cabonossi, bread sticks, carrot & cheese slices in avocado dip)
Bowl of watermelon balls.
Bowl of pineapple pieces
Chocolate Spiders (chow mien noodles in melted chocolate & cooled on baking paper in fridge
Snakes or spiders in jelly (mix your jelly & as it is setting add some plastic bugs, snakes or spiders)
Marshmallow ghosts (marshmallows with icing drawn ghost faces
goblin eyes in spaghetti (Meatballs with an olive in the centre in spaghetti & sauce)

yum-yum


Activities:
If you were hosting a party or making a day of it with friends there are plenty of things you could do.
I had printed some Halloween themed stencils out so they could colour & draw
You could make our foam-bags-to-learn-about-colour-mixing in a Halloween theme as we did before
You could have a monster sensory box to play in click here 
You could make spiders like what we did here 
You can google the meaning of Halloween and teach older kids where it derived from
You could make goody bags.

Goody bags:
This was our first Halloween theme and seen as there were only two 2 year old kiddies to amuse we didn't go all out. They shared a treat with each other & that was enough.
They got a plastic see-through cup each for the gruesome hand punch
A glow stick bangle
A glow in the dark scorpion & a Black bat
A fake spider in some web
A little devil mask
& some appropriate lollies to take home


Foam Bags to learn about Colour mixing & a Halloween treat

These Sensory Bags are great for learning the concept of colour mixing. We went one step further & turned them into Halloween Sensory bags

All you need is Shaving Cream/Foam, food dye & a Sealing Sandwich bag.

*Fill the bag from the bottom up with shaving cream, mush it around & get as much air out as possible.
*on a flat surface part down one side, this is where your first colour will go. We did Yellow
*Again, do the same on the opposite side & pour your next colour down, we used Red.
*Seal it & let your child mix the colours around. Gradually you will see the shades mixing. What colour do they make?

 They feel like a pillow to begin with, they are real puffy & filled. This is our colours to begin with.
 Mixing, moving, squishing, poking..............    wearing it on your head maybe? However you like to play with them will end up combining the colours!
There you have it, my little one learnt how red & yellow combine to make a bright Orange colour.  Because it is Halloween soon, we used the bright orange bag for a Halloween Sensory bag.
Carefully open one corner up & add some Black spiders, bats or snakes for Halloween. Make sure to push the foam down a little near your opening because the seal it bags wont work if they have the shaving cream in the sealing run.


Now you have a Spooky Halloween Sensory Bag.

We also did a big one with lots of colours, which made lots of different shades of green, pink, orange and it ended up looking like one big Rainbow Paddle pop inside (well i thought so,  i still feel like going to buy a rainbow paddle pop, YUM).


Digging for Dinosaurs; 'D' activities

D is for Digging, Dirt & Dinosaurs.


Digging up dinosaurs seemed like a really suitable outside activity to do with my boy. He is such a boys boy, he loves to get dirty & playing in the Mud.
I found some dinosaur Skeletons at the local toy shop & instantly imagined them under mounds of dirt. S could be a little archaeologist for the day & it falls nicely into the letter D learning theme I was trying to do with him.

So I got the dinosaurs & in a large old plastic tube mixed some potting mix i had left over, sand & dirt from the garden. I buried the dinosaur skeletons through out the dirt putting some along the side so he could see them from the outside of the box. I tried to bury them all in different positions and in different places, then packed the dirt down firmly. I Planted one in the top so that a foot & a back bone could be seen. That's the starting point, and then i watered them in the hope they would grow into real dinosaurs. Ha ha, no just kidding, I'm not that loopy (but that did make you think didn't it?)  I watered them so that the dry sand & so forth would compress a bit more & pack down firmly. then i let it sit over night.

This was a great out door activity & could be done in a nice clean deep sand box, in a new garden bed or even at the beach as long as you mark out where they are buried so that you don't spend hours trying to relocate the dinosaur bones :p  I added some garden dirt into the box so that my little one could come across some real life worms as he was digging, and he did!
I made sure you could see one through the side of the box just to get things started & build up his anticipation.


Lets get digging. This was very hands on and messy, just what we like.  I gathered a few different size spades from his sandbox and added a larger one and a small scoop but of course by the end of it he just wanted to use his hands. (Make sure if you are using dirt from the garden that you rake through it & divide it up, mix in some sand and make sure there are no dangerous spiders/bugs living amongst it).

It didn't take long before he was finding skeletons and he learnt that if he tapped them on the side of the box all the dirt would come off. He did well! He used the large spade initially and used the hand spades when we got down mid-way, then he used the little scoop when he seen a foot or a bone so he could dig small amounts from around it, then he would wiggle them about so that he could pull them out. Tap them to get all the dirt off & whip them along the grass.

Coincidentally as we travelled right up the yard to dig, the neighbours (who are sub-dividing & building a new house) had hired an excavator and a dump truck to dig out the foundation of their house. So we watched them for a while, S loves his construction and told me they were digging a 'massive hole' for a tree :s


Once he had found all the dinosaurs, played in the dirt for a while, re-buried them & had enough, we had to wash them. His idea of course, so we washed them & laid them out to dry.
Tip: We had an empty bucket as we were digging out the dirt, so we could transfer the dirt out of the way & use it for planting later on.

D is for Diggers in the Dirt : Free Play

Following on with the D is for Digging theme, I got a few cheap diggers from the Bargain shop, i think they were $2 each & since we often go out onto the property we have in the bush I thought it would be cool to have a plastic box full of diggers and digging equipment that can stay out there so there is always something for S to do.  There is plenty of dirt out there!  There is empty garden beds with lose dirt so i just used that & put a few shovels full onto the ground, making sure there were no creatures living amongst it. You must always be careful because spiders like to make home in dirt, and something I got in to the habit of doing when i worked with school ages children was to check the sand & dirt before they could play. Actually it was policy for us to check the sandpit each & every day before they were allowed on because you never know what could end up buried or living in it.


Here he decided to bury & dig up a dinosaur skeleton after the dinosaur dig the day before!  Then he made Minnie mouse a house (an old biscuit/shortbread tin), she even got a tree & the digger was building a new house (possibly because we seen the digger next door the day before digging a hole for a new house foundation).  I love his enthusiasm, he gets right into his story telling.


S enjoyed digging, pouring water around to make mud & he dug a little trench so he could see the water flow down it, as he was playing we were talking about the way the water was flowing with the slope of the hill and how when it rains it runs down the hills, rivers and so forth until it reached the low point which is normally a Dam. So we made a little river & a dam down the bottom.  He also had some toy farm animals so they were drinking from the dam.  The diggers were definitely a hit & he played with them for an hour or so & then spent another hour cleaning them off, washing them & splashing them through the water.  For a nice warm day it was a lovely activity to do outside, it kept him occupied, it was hands on, messy, fun and we will be sure to do it again.  What little one doesn't like making MUD pits & playing in the dirt :-D

Construction Sensory Box: D is for Digging theme.

In a tub put bits & pieces of different texture & size along with some tools. Here we used some decorative stones, small silver ones & larger black pebbles, there are some larger lucky stones, a pine cone, a fake plant, a piece of drift wood and of course, the construction diggers & signs. I gave S some spoons and measuring scoops to dig with. The first thing he did was fill up the dump truck & again he asked to dig up dinosaurs so we buried some little toy ones he had in his room.

This was an easy peasy japanesey activity and he did well at keeping everything inside the box. I love sensory boxes as they are hands on and led to much more imaginary play; well isn't it lots more fun to actually play with scooping rocks rather than just pretending? I think so.
The digging technique of this activity was very tactile, with the different size spoons, scoops and digging tools he learnt which size scoop work better to dig holes, which fills up the dump truck in the most effective way and in the meantime he got to practice manipulating objects that he uses every day (like spoons for eating).


Happy Digging!

Spider Webs & the very busy spider

THE VERY BUSY SPIDER ~ Web/Glue paint activity.

After reading the Very busy spider by Eric Carle & noticing that my little one loved the feel of the spider web embossed we did this Art project using Glue & black paint, then he painted his webs & made spiders on wool web to hang off his Art.
He was so pleased with himself when he had his finished & dried project, spider & all, which felt just like the busy web in the story.


First you need PVA glue or similar & some cardboard or card stock.  If you have an older child they could help with this bit if they are patient enough to leave it dry overnight but seen as my little man is only 2 I pre-glued his web & put them out to dry.
Black glue:  Glue with black paint, or you could do red if you wanted, clear or any colour depending on what you wanted to use it for.

We tried a black web & a clear web.


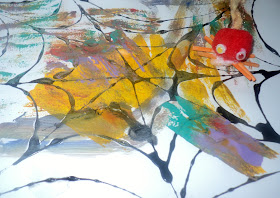
Once they were dry (the next day) I got out the paints & some rollers, brushes and sponges. With a variety of colours I let my little boy pick & choose how he wanted them to look. I'm still trying to get him out of the habit of smearing, he loves to get a bit of green on his brush, then red, then yellow, then blue & so on before painting with it, mostly his art turns into a big smear of brown ha ha, but the rollers seem to do the job. He enjoys it!

One was yellow. I don't know how that worked so well, i think because I had a cheaper full paint tube of yellow. . . So I stacked the yellow on & it was his first choice, he had a little help with this one. Initial encouragement to show him the ropes, that's all! Then i let him at it.


This one above was a fence post, tree & a web through the sky. He did really well at painting the fence palings.  The one below was just a random experiment I did with the black glue on normal A4 printing paper to see if it was too thin but it worked fine, the glue also worked fine so i held onto it so he could use it up after he did his webs.
After all our paint sessions there must be an outburst of hand painting & messy prints on the left over newspaper, that's his new thing!
Then he helped with the spider making. These are our drying spiders. All they are made from is a large pom-pom with 2 eyes & 4 matchsticks criss crossed & glued on the underside.
Then a thread of wool is also glued to the under side. Easy peasy. I am sure their are some much more creative & better looking craft spiders out there but this is what i had in the junk box & it was something he could lend a hand in making. He chose the colours & put the eyes on, then the hardest bit was waiting for them to dry!

Once the base/background was dry on the yellow web we got a mauve coloured paint & a sponge, then only lightly smeared it over the web. This was in the aim to only brush over the intruding glue web that you can feel, just to make it stand out a little. This was his final task & here it is below.....

Once they are dry I scewed a hole threw the cardboard for the wool web to be threaded into, taped it  secure onto the back from one corner so the spider was hanging from the front of the web. Now that i am reflecting, it would possibly have a better effect with a shorter thread attached through the centre of the web!  This is web #1 that got given to Nanny, he was so happy to give her his master piece.


#2 web got kept. I asked who this one was for & he said it was a present for Daddy. I'm glad, I wanted to hold on to it, we'll put it into our under bed container of Art pieces & memories after it has been displayed for a while.

Story stones for Imaginative free play


I thought this would spark the imagination in my 2 year old son. He loves me telling him stories & reading to him, its not unusual for us to go exploring & make up stories based on "who lives there" concepts.  So these story stones have given him an outlet to make up, create and enjoy telling me stories. I think its a great idea for pre-readers who love story time & it gives it a realistic hands on approach for little active minds. It also aids in speech development, improvising & interaction.


Recently my partner bought an acreage on the river so our new thing is to go exploring, looking for possible homes & stories to make. For instance, the weekend just past we went for a walk along the river bank we seen the usual "locals homes" wombat holes, platypus holes, birds nests, water dragons basking on over hanging tree branches, then comes the story telling. Fairy's that live in leaf house among the tree branches by the river (clumps of leaves& mud stuck in branches from when the river has been high), leprechauns live in tree roots surrounded by clovers, mystical creatures in Madden hair ferns & so on. . . This gives a good opportunity for me to teach him precaution when in nature- the dos and the donts about touching things & to keep a look out for dangerous animals.
This is something I love, it opens the gateway to imagination!


Story stones I think are also a very unique way to develop imagination, or at least open the gateway so you can witness the ice tip of a huge submerged, unconscious ability that children have. It aids in learning, allows creativity, it can be adapted to their interests or emerged into a theme & can be used in "free play" because the child uses initiative and cognitive processes to develop their own stories.


Story stones:  What you will need
*stones, rocks, pebbles, or river rocks. We used these pearly white ones from the decorative gift isle at the $2 shop (by the way, the $2 shops would love me they're one of my favourite, cheapest resources)
* paints & brush
*ideas
*acrylic sealing or enamel spray
*a jar or container to story them in


What i tried to do was base the story stones on things that my little one loves at the moment and has consistently been fascinated by, such as bikes, trucks, cars, fish, sharks, building, pirates.
I didn't have a theme so to speak but you could quite easily adapt a theme for example a farm theme would be great with endless possibilities.
While I was doing these my little boy joined in by doing his own pet rock on a large river stone he held onto while we were out exploring. 


Of course you can put is as much or as little effort & artistic talent into these. Put it this way, You don't have to be an Award winning Artist to paint a picture on a Rock that a 2 year old will love. :) So long as they are able to see what it is & go from there.
I am no artist and I am a little time constrained so my pictures are on the rough side on the artistic continuum. I didn't plan on putting too much time into the details of the pictures, I would rather spend that time using them so no comments on the dodgy painting skills please lol.


In this one, the dinosaur climbed up the ladder to get to the top of the tree where he looked out for something to do . He seen a Motorbike so he jumped "really big" off the tree & landed on the motorbike, he rode away but in the process he scared one of the monkeys who lived in the tree. He fell out & hurt himself.
It is interesting to see how little children perceive images as well. The stone you see at the corner was meant to be a worker pointing (being the boss & all) with his hard hat on, he also has a construction digger & a shovel/spade that theme together, well i thought they did but apparently this man is the Daddy waving & he needed a Mummy. where is the mummy?  luckily i had some spare matching stones & did a few more pictures based on what was missing, including a mummy. How could I possibly forget a mummy stone ha.

Then there were more..... This is the second addition to the story stones!

He is getting the idea of it. Most of the time I cant hear exactly what the story is & I have to listen very carefully without interrupting him - His stories are much more imaginative when he is left on his own compared to the stories he tells me when i offer encouragement!


Ways to play:
*Take turns telling a whole story
*Pick one stone at random out of the jar & make up a story about that
*Take turns of picking stones for the other person to make a story about
*Take turns, stone by stone to incorporate both your & other peoples favourites themes
*use them with story books that have similar theme or items in them
*use them for word identification "where is the...." what makes the ___ sound"
*Memory game, match partners up & have them upside down until you find the matching pair (eg. fish & crab, fireman & the fire)
*Hide them under cups & do a memory match game
*make up a sequence & a story & then publish it with photos & words.

You get the drift.......

this is the spray that i used to coat them. I think this is the hidden secret because without within 3 plays my boy had ruined a couple of pictures so I re-painted them & used the enamel that dries super fast. I did catch him once again trying to pick the paint off again but this time around he gave up & got a warning not to as they took a long time to make & i plan to keep them to use as his language is developing so fast at the moment, if we pull them out once a week even I am sure I will notice a difference in his preference, language, sentences and in his story telling.