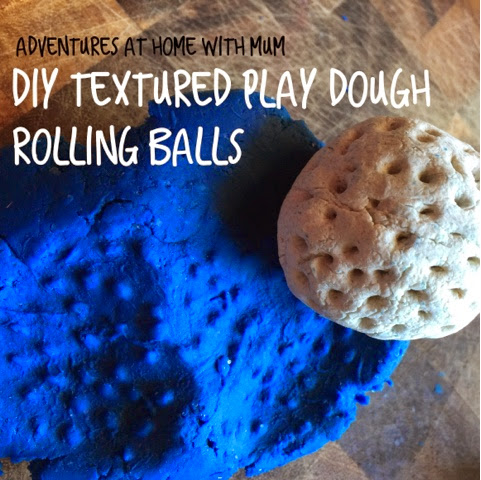
I made these cool salt dough balls with prints in them the other day so they could be used as textured printing balls in playdough. Little miss Cherub (20 months) loves her playdough at the moment and squishing all sorts of things into it to see what pattern it will make so these worked really well. If you have a child with some measuring and cooking interests you could get them involved in the process of making these by introducing measurement, pouring, mixing, kneading, food prep and baking. Here is our easy DIY textured Salt Dough rolling balls for some super cool play dough printing.
DIY Salt dough;
Add 1 cup flour,
1 1/2 cup salt,
1 cup water and
1 tsp oil.
Mix into a dough consistency by adding a sprinkle more flour if it's too sticky or sloppy.
Mix together well, knead it for a few moments then let it sit for 5 so it expands and toughens a bit, (this isn't necessary but I found it made it easier to work with).
While you wait you should preheat the oven to 100- 120 degrees, remember your not going to stuff it up if you get the details a bit wrong 😊 it's a pretty flexible recipe.
Lay out some cooking paper ready on a tray & take the opportunity to clean up any flour dusted little hands (chairs, benches, walls and where ever else kids manage to splat ingredients on). Once your happy with the texture of the dough roll it into even sized balls about the size of a childs fist (great size for them to hold & roll).
To make our textures in the salt dough ball we used a tooth pick to puncture small surface holes; the handle end of a wooden spoon to get large round deep holes; a fork to Criss-cross thatch lines; and a print on an ornament that had snake tails, the key is to look around and think abstractly.
Look for deep textured or significant prints that are highly visible and will last the cooking process. You might find a crochet cloth works, a glass 3d print vase, wood carved furniture, utensils, jewellery, a weaved leather belt (anything really).
The trick is to roll the salt dough ball around it enough times that its printed deeply on every side and do so with as little skin contact as possible because the more handling the more you flatten or smooth out the pattern, you want deep and noticeable patterns so it prints well in your playdough.
Once your happy lay them on cooking paper and slow bake to dry them out for an hour at least, maybe even longer depending on how thick and large your salt dough balls are. You will see them dry out and lighten up changing colour as they cook, turn them a couple times just to even the process out & tap them to see if they're cooked right through. They should be very hard.
That's pretty much it, let them cool and they're ready to roll.
Now all you need is some silky playdough and someone keen to roll them around. Both Dimples and miss Cherub enjoyed this playdough extension and experimented with rolling the textured balls in different directions, pushing hard and soft, rolling fast and slow then around in circles, they tried just plain pushing it in a ball of play dough and all sorts of cause effect experiments. It was lots of fun!
What do your children like to use on their Playdough?
More Printing ideas;
Outdoor Surface Rubbing
Play-doh printing everyday texture
More Salt Dough ideas;
Dinosaur fossils
Halloween Salt Dough
Happy Adventures


