Showing posts with label educational. Show all posts

Alphabet Chicka Chicka Boom Boom Tree


When it comes to direct learning which isn't hidden in some form of play Dimples finds it quite a bore, looses focus and doesn't want a bar of it. He hasn't really been interested in the alphabet, reading or identifying letters besides his name until recently so to foster this new interest of early literacy in a fun hands on way that isn't plain boring letter recognition we read the funny story Chicka Chicka Boom Boom by Bill Martin Jr. and made a Felt Alphabet tree to go with it.  


We started with two large postal tubes (you know the ones you send posters in), filled one with some sand to weigh it down, duck taped them together and Dimples painted our soon to be tree trunk brown.
Then we did the branches using paper towel rolls painted green, these were cut and shaped to fit into one another at the top of our tree trunk, then they were also taped down firmly.
Next we used some felt cut in the shape of palm leaves big enough to fit over the rolls, these were hot glued down using a hot glue gun. Dimples helped position and press them down.
What is our tree missing? Dimples come up with the idea of using paper bags scrunched into balls to resemble our coconuts. He carefully helped glue them into position and then we were only missing our Alphabet letters.


The Alphabet letters were also glued onto the felt with a hot glue gun. I found some cheap wooden letters off eBay for a few dollars, you could use those plastic magnetic ones or foam letters but these wooden ones did the trick and stuck nicely with hot glue. First we ordered our alphabet along with the story, finding each letter as we read the pages, then once our tree and glue were prepared I called out letters and Dimples went and found them for me, helping to stick them out. This was great for letter recognition and he found fetching them as quickly as possible lots of fun.


The story gives a good opportunity to discuss why we have upper and lower case letters. Why do we have two of each letter? it also goes over the alphabet with visual cues in both the story and the illustration. Its a very upbeat fun story using rhyme and humor.

Once our letters were on we re-read the story and Dimples reenacted it pretending to be certain letters going up the tree and shaking it when they all fell out. Now we use the Chicka Chicka Boom Boom tree in many ways, as a story prop and along with letter identification when we read the story. Dimples points to the letters as I sing the alphabet, we combine it with an Alphabet Abacus and a Alphabet placemat and play letter match, we play I-spy; mixing it up so he can search for individual letters.


Learning Concepts:
Early literacy
Learning the Alphabet
Benefits of craft
Letter recognition
Identifying individual letters
Discussing upper and lower case letters
Connecting literature, hands on craft and fun

Ideas to Extend with:
A DIY Letter Puzzle
Alphabet match using other forms of the Alphabet.
I-Spy Letter search
A name Letter Recognition Sensory Bag
Use magazines and news papers to go on a letter Hunt for a drawn Chicka Chicka Boom Boom tree


You can keep updated with all our Adventures by following Adventures at Home with Mum on Facebook, follow us on Pinterest, or check us out on Instagram.

Building a Body - Preschool Anatomy


This has been an ongoing project for a Month or so, after reading an interesting post by An Everyday Story on Reggio inspired learning. I asked Dimples what he would like to learn about, his answer was his body. We talked and defined exactly what he wanted to know about his body, Dimples decided he wanted to know about bones and what was inside his body. Then we discussed exactly how we could learn about this. "Make a body" was his top suggestion & his tag body book.
I was so inspired by his suggestion and I went researching, I set up a self inquiry table where he could explore things about the Human body.


On the table we put his tag reader along with a height chart, some posters on Human Anatomy, he chose some books from his large collection of book that represented the human body. There were some early words human books, some activity books and the cat in the Hat body book. I found a copy of the Magic school Bus goes inside a Body DVD and a little Human replica with removable organs. We had a sponge stress ball of a brain and a liver, we had some body magazines and a rib cage, we had a large Body Puzzle.


Then it was time for Dimples to explore and guide his learning with these materials. He was very interested in digestion, and in particular how food turn into poop. We did this fun experiment on Digestion in a bag, to show how stomach acid and muscles work to digest food, then we made a Body with lungs, a stomach, intestines, a heart, liver and bones.


First we traced Dimples silhouette onto cardboard. Then as he used his Human Anatomy Tag reader to explore the path our food goes on, he compared his activity books and his human replica model and discovered the intestines. Using crepe streamers we cut one along the middle to make it the "small intestines" and then used a darker colour of full width to do the "large intestine" on the outside and glued them into place on our body. Being a typical boy, Dimples found it funny that the poo comes out the bottom and had to keep mention "and then it gets pooped out there!"

Using two cardboard shoe soles from a pair of slippers I had bought (you know your a Mummy blogger when you keep everything that could possibly be used for craft purposes) Dimples next explored the lungs. Again cross checking with what his tag reader said, reading through his books and looking at a reference text book I had he learnt what the lungs do.  We got a paper bag and did a little experiment breathing in and out, watching it inflate and deflate as he breathed then he painted a couple of nice red lungs for his Human. Using a hot glue gun we put them into place.


The inside of an Avocado tray proved to be a good shape for our stomach, Dimples used ribbon around the inside of the stomach to represent the stomach muscles and put in some crepe paper to represent the stomach contents then we closed it up in some bubble wrap, stapling the outside and trying to shape it as a stomach. The liver was a piece of maroon felt. both were glued into place on the body and it was starting to look very interesting.

Next was the heart - I racked my brain, how on earth could I make a heart. I was pretty pleased with what I came up with. A pink Balloon filled with flour. I then cut a blue balloon so that there was only really think veins left and then it was put around the flour filled pink balloon, then the next layer was a thicker red balloon with pieces missing. It turned out pretty cool looking.
Dimples was impressed. We did a experiment on the heart; listening to it through a stethoscope, running around & doing star jumps for a while then listening to it again. Our heart ended up being a little high once we stuck it on.

Then of course we had to give our body a brain. Dimples has a couple of brain stress balls and knows the basics of what the brain does, he used his tag reader and asked many questions then made a brain from a pink piece of felt cut out in a brain kind of shape. He used pink fabric paint to represent the parts inside the brain and the wriggly form of it, and glue to represent the grey matter. It took a day to dry but it really looked the part when it was complete.
I glued it on with a hot glue gun and he added some big craft eyes, an oesophagus and a trachea straws, then he had to draw a smiley face.
  

The body sat there for a week or so, Dimples wanted to do bones on it. Another tricky task.
In the mean time we explored fish bones washed up on the beach.
Eventually I got the idea to use flat bamboo from some fencing we had, we painted it white and glued them on as bones. We used white bottle caps to represent the knee caps.
We did some experiments; We put a chicken bone in vinegar for a week and made it go bendy and we did some bone drawing on black paper body shapes with chalk as well as reading and looking through reference books. We searched the Internet and looked at Xrays and Dimples got interested in what animal bones looked like, so we looked at different shapes animals and how their skeleton and spin is positioned differently.


All pretty interesting stuff.
The entire experience was a fun hands on learning one for Dimples and he enjoyed himself making sure he asked lots of questions that we searched to answer, he showed me just how curious he is about our world and how things work.

Learning Concepts:
Human Anatomy Basics
Linking facts, visual learning, craft and our physical self together
Hands on learning using a wide array of skills
Self guided inquiry
Science

Ideas for Extension:
Science experiments; how our lungs work, listening to our heart after exercise, exploring bone structure.
Trace body parts
Digestion experiment
Cut out human figures and draw the different body systems on it
Cut out black body figures and draw Bones with white out or chalk

Happy Adventures

If you enjoyed this please Click on the button below and vote for me in the Top 25 Australian Mums Competition. Cheers.

Digestion Experiment in a bag : Exploring the Stomach

Lately Dimples has been fascinated with human Anatomy. We've been doing things focused on the human body & he's been doing lots of pretend doctor play. As usual, he has been asking lots of questions and telling lots of stories.

We started making a cardboard model of a human body and using his leapfrog tag human body book we explored and learnt about digestion, breathing, the heart, the function of body parts, the skeletal system and extending on this by developing his own "person".


One of the things he found interesting, as I'm sure many preschoolers do, is digestion and where the food goes before it turn to poo. Dimples uses the basics to explain the process "food goes in & my body uses the healthy bits for energy like petrol". We talk about how carrots help your eyes see good, fish makes your brain quick witted, beans are good for your blood and your heart, yogurt strengthens your Bones and so forth.

This digestion experiment was done to answer some of his questions about the stomach, food (& poo) and why food goes in looking lovely, where it goes and why it comes out looking like.... anything but pretty! That's putting it nicely, Dimples didn't say it quite that way :-)
 
 
We got a large zip lock bag to represent our stomach.
Then I laid out some different types of food varying in color, texture, a range of what someone may eat through a day and I asked Dimples what his 'stomach' would like to eat!
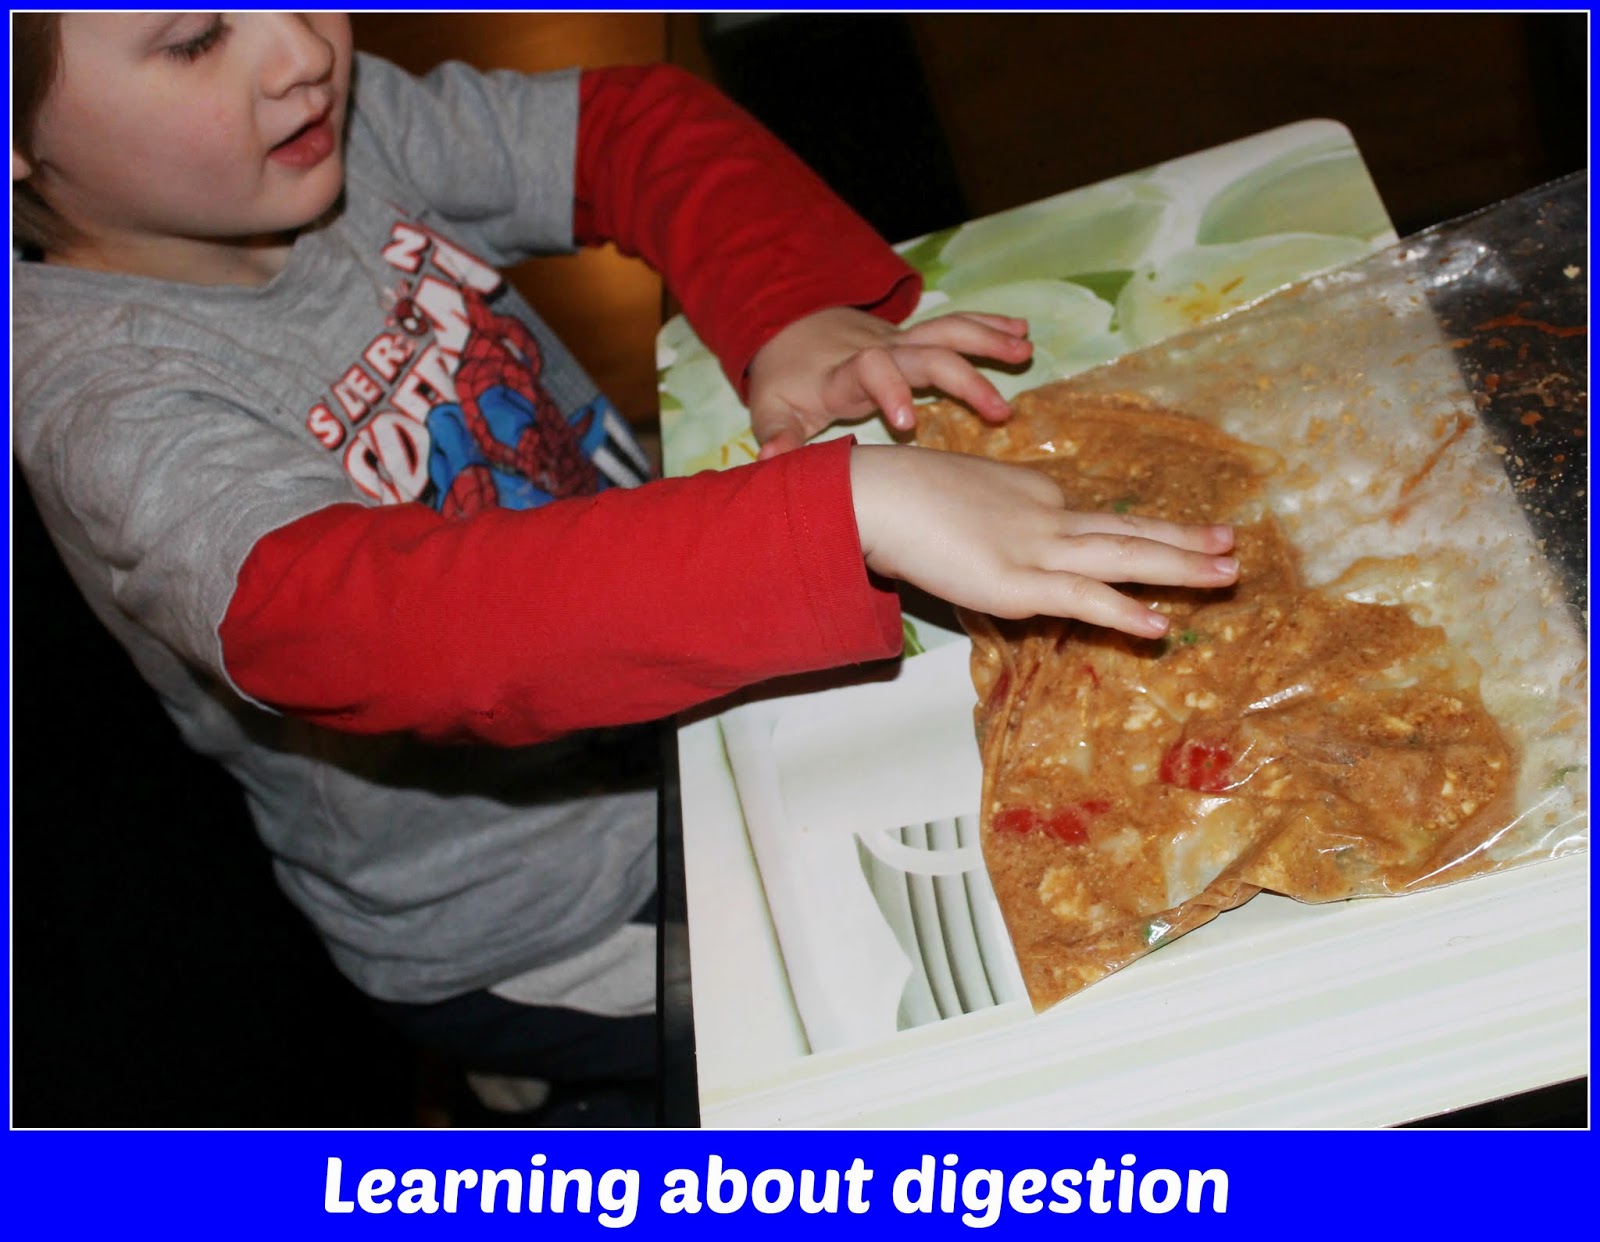
He added in some peas, cauliflower, cheese, scrambled egg, tomato sauce, potato chips, tomatoes, a biscuit, Vegemite on bread, juice, strawberry, banana & jelly into his "stomach". It looked fine for a moment.
 
We discussed how the stomach digests the food and how the stomach has acid in it, where the food travels before it enters the stomach and then where it goes before it comes out. Dimples pretended to be the stomach muscles; the stomach is a muscle with three muscle bands and it helps crush, mosh, and digest foods. Stomach acids work with the muscles to digest and pass in the food so as Dimples worked away like a muscle would he started pulling some faces 'gross' 'yuk' 'look'.
 

It ended up looking very gross, lucky we have strong stomachs because the sight of it looked like vomit. He poked at it and squished it inside the bag making sure it was fully digested.
It was very interesting for him and it did provide a fun way to visualize the digestive process and answer some of his questions.

Learning areas:
Sensory Activity
Linking Observation to Cognition regarding human anatomy
Basics of digestion
Exploring Healthy eating
Learning about human body processes
Experimenting and exploring
Cause and effect


Happy Adventures

Our Art Centre - Freedom and creativity

Craft is a fun way to let children explore lots of different materials and resources while building on their fine motor skills and many other crucial developmental abilities. It is a great tool for inside play on rainy days or for the times your child is feeling crafty and creative, it can also be a fun outlet for imagination.


Is your craft usually structured?
It can get very messy.
Young children love LOTS of glue and need to learn to hold scissors correctly and I am sure you have had your share of Art creations that are wall art or carpet sculptures?  I remember finding Dimples one morning camped up under our king size Doona, quiet as can be.... I now have a lovely white flannelet fitted sheet with beautiful black swirls all over it!

For this reason I, as I am sure many parents do, easily fall into the habit of using quick easy craft ideas out of books and off the web that require few materials with the least amount of glue and let dimples make his own version of these cool craft projects.  Cool yes, original No!

To celebrate Dimples creativity I decided to redesign a corner of our home as a Art Centre for him where he has the freedom to create what ever he wants to safely. Everything is at his level and organised. All his materials and tools are bright, appealing to the eye, easy to see and easy to reach.  He calls this his "business" & his "Office work".

The materials in it are all his to use for the taking as he wishes, however there are rules he needs to obey such as using the bin, tidying up, using materials wisely not wastefully and sitting at his desk.
So far so good!


Dimples Art Centre includes-
  • His own glue (sticks and clag only mind you),
  • a scissor caddie,
  • The scissor box You can check out the scissor box idea here 
  • sticky tape,
  • some craft jars (sequins, googly craft eyes and beads),
  • a crayon caddy,
  • a pencil pot,
  • a pot full of bingo stampers & stamps,
  • a pot full of kids stamps and hole Punch's,
  • colour coordinated markers in jars (These are office pen jars painted and hung on the side of the shelf)
  • a file of coloured paper and card stock,
  • a box full of colouring in books,
  • a box full of craft paper and envelopes (cellophane, crepe, wrapping paper)
  • Craft draws with felt stickers, pipe cleaners, pompoms, ribbons, chipboard letters and numbers.
  • His own Desk, Bin and Display string with clips.
  • stickers
To date there has been some unique and clever creations that I would never have thought Dimples could or would create. He has let his imagination go and its been amazing to watch how this freedom has allowed him to express his ideas in a way he wants. If you are creating a space like this you must remember that these materials will most likely get used in every way other then intended, sticky tape around crayons for instance but the point of the art centre is freedom and creativity so pick your materials wisely and keep the special resources out of reach.


Dimples is nearly 4 and has been very responsible in his space, if he were a little younger or this space was tucked away in an area out of sight I wouldn't be comfortable with this much freedom. There are times when he will just sit and cut different shapes right into the bin from his scrap paper, he is still learning, focusing and practising important skills so I am happy for him to do this.

That is the beauty of the art centre. It is meant to provide freedom so if he feels like sharpening all his pencils for no apparent reason then he can, if he feels like folding a pompom over and over again inside a treasure map then he can, if he feels like cutting a bit of paper into a million pieces then he can and every once in a while he makes an awesome creative piece of art that I get to hold on to.


Happy Adventures


Dinosaur Fossil Discovery


Dimples has been doing some Dinosaur Activities at preschool so I thought I would extend on this at home.  He has always loved dinosaurs and we have done Dino fossils before but this time I tried to make them more realistic so he can link the fun he has had preschool to the fun he has with his dinosaurs at home.

It was a success, they turned out much better and looked real!


My little master Chef helped mix up a batch of Salt Dough, see the directions below. To make them look as realistic as possible we added some black food colouring, so that they looked like real rock fossils. It worked well, they turned into a dark grey rock colour. We made some extra fossils so he could give them to his preschool group and we did a little palaeontology digging with his favourite ones.

They were so easy to make and Dimples loved pressing his dino toys into the dough and inspecting how they looked, he looked closely at the details and did a few experiments with some foot prints before deciding which ones worked best.


 How to make Realistic Salt Dough Fossils
Ingredients:      
1 cup cooking salt,
2 cups of flour
1 cup hot water,
Food colour or tempura paint (we used black food colouring)

Directions: 
Mix together salt and flour, gradually add the hot water.
If you want to add tempura paint or food colouring to your fossils add it into the water first.
Mix into a dough consistency and then knead the dough for 5 minutes until smooth. 

Divide the dough into small rock shapes, make them roughly the same thickness and size so that they bake evenly.
Gather some toys that can be pressed in to form your fossils (plastic animals & dinosaurs feet and body parts work well). We had some skeleton Dinosaurs which worked perfectly and some plastic dinosaurs with realistic feet shapes.
The salt dough can be air dried but for a better quicker result bake it slowly on low heat until rock hard.  We baked them on 120 degrees for an hour and a half but this depends on the size of your fossils. You can double check if they are dried properly by inspecting the bottom, it should be hard and evenly cooked all over without the 'dough' look. 

Once they're cooled  off they can be painted and decorated or left as is.


Play Idea:
Bury them in a sand box to be “discovered” (if you have a large sand box you could put a small flag above where they are buried). 
Then provide your pre-schooler with a small spade, pick and some paint brushes.
Once they find it, they can un-cover it and brush the sand off.
You can ask them to be very careful not to break or damage the fossil and get them to brush around them as a real palaeontologist would.

The discovered fossils can then be added to small world play and put on display.


Note: If the salt dough fossils get wet they will turn back to dough and crumble away.


Happy Adventures

The Bank - Learning to Sort, Save and Give Real Money


Handling money is something children see their parents do on at least a weekly basis. They watch as we buy the groceries, pay the bills, get the fuel, buy their shoes or that treat they've been asking for, gifts for others and so on. It's endless and an important fact of life.

Think about it though, how often do they watch us save money? Or what about Giving money?
Not often because it isn't a constant visual occurrence and in comparison to the outlay it is usually small, this is something I try to aware of so Dimples learns to save and not spend (especially not on unnecessary stuff) and more importantly, so he learns how to give to others who aren't as fortunate. 
Yes stuff can be nice, but I do not wish for him to think money just magically appears from a box in the wall as we walk down a street (or from a plastic card that is kept in my wallet) and I certainly don't want him putting a higher value on things and stuff, rather than quality time, family fun and how fortunate we are in life.


Our children see us spend but they don't actually "see" us save.
Most of the time, savings are done by Internet transfers or a trip to the bank so you can not literally 'see' the money accumulating. This is where I have tried to change things a little. Dimples has several piggy banks that he can see and if we have some small change laying around it goes in his piggy bank to get saved up. If he finds small change at all, it gets saved. Some times if he does chores that are out of the ordinary he gets some small change to save in his piggy bank. He often finds coins when he helps me get the washing out to put on the line (whoops!).


It takes months to fill so this is a pretty special time but once the Piggy's are full we empty them into his "Bank" to actually see how much he has saved.  He loves pretending to be the banker. It isn't as much as it looks because most of it is 5 and 10 cent coins but to his innocent eyes, "oh my goodness look at ALL those coins I saved!"  He excitedly tells me he has saved lots & that he has so many coins. This is a huge achievement in itself and is great way for him to see the build up of saving. Then comes the fun part, the sorting.


Dimples is too young to know the real value of coins and to add them but I don't think he is too young to be introduced to them and handle the coins while mummy has to count them!
First, I photo-copied a set of coins in colour and used these as labels for 6 bowls to go with our large  "bank" container.  This helps Dimples visually identify between the coins.


He sequenced and sorted through them, dividing them into the correct bowls, matching them by their pictures and taking favour to fifty cent coins. (Probably because it is the most identifiable one and the largest). We discussed the concept of saving money, how much each coin represents and their order. Some of our Australian coins are pretty cool so we discussed what was on the coins; For instance our Kangaroo, Lyer bird, our Echidna and we even came across some special edition Olympic coins and so on.

Big Savings:
After they were all sorted, I counted them up and put them into their individual bank bags. Dimples has his very own pass book, so we put all the coins in a large bag with his bank book and they then get taken to the bank teller to save into his account. He does understand the concept of saving it up for something special when he is a big boy which I think is important rather than thinking money is just spent spent spent.

Small Spending:
For all his hard work Dimples gets to take two coins in his pocket, one coin is for him to spend on the way to the bank, usually a one dollar coin that he uses in "the claw machine" at the local supermarket to see if he can win a toy or to go on the moving car ride or buy a small treat.

Giving to Charity:
The other coin is his pocket is the important one, he takes this coin in his pocket and this one he has to give!   He gets to choose which coin and he donates it to charity on our way, usually it is into a box at the supermarket or the bank that is asking for support that month (red cross or the cancer council), sometimes there is a salvation army volunteer set up or a local person asking for donations for a cause they are participating in.  What ever it is, Dimples puts his coin in and we talk about how it will help someone else in need.


The Scissor Box - Practise cutting with big boy scissors

The Scissor Box: For cutting practise using Big-boy scissors.
 
 
 The Scissor box is a little tin we have put together that is full of all different materials that can be cut easily.  Dimples has a special pair of 'big boy' scissors to practise with that are always kept in his cutting box.  This is a quick and easy activity that I keep tucked away for special time.  It is easy for me to grab out when we have a little time to calmly focus and pay attention on the task. For now, it remains a special mummy time activity that he can do when I am with him or keeping a close eye on him.  It is still a great incentive for him as it gives him a sense of accomplishment and confidence in using his big boy scissors.


In side Dimples Scissor Box I have a wide range of different papers and materials that are easy to cut. Lots of different shapes, sizes, textures, colours, thicknesses and some printables make it interesting to sort through. He has a small box that sits with it so when he cuts small pieces he can throw them out, and keep all his bigger pieces in the box for another time.


Material Ribbons
Felt squares
Colourful card stock
Crepe Paper
twirling ribbon
cellophane paper
cardboard
wrapping paper
Foam pieces
Metallic papers
Scrap booking papers
Magazine pictures
Vellum transparent paper
& some scissor practise printables.


I have also added some of our own cutting practise lines on the colourful paper. Just grab a ruler and a pencil and do a dotted straight line, maybe a few zig zag ones or a wavy one.  You can also do it on magazine papers or wrapping paper to help your child see where to cut in order to cut out a particular picture. I did this with some cars & Thomas wrapping paper as I knew Dimples would want to cut Thomas and Lightning McQueen out.


Not only does he get some quality time with me and some practise using his big boy scissors, this is also a great way to boost his confidence in his developing skills.  He gains a sense of achievement and his self esteem develops more as he succeeds in the fine motor tasks he is learning to master. It is also a good activity to build up attention span, focus and concentration.

 
Happy Adventures


Halloween Sensory Tubs

Sensory tubs are the perfect activity for Halloween!
Lots of cool textures, gross feeling slimy things and bright colours. 
This is a Halloween Themed One we had at our Halloween Party.


The Basics:
A sensory tub includes objects that encourage children to explore using their senses.  It is an easy way to teach children about how they experience the world and to enhance their visual, tactile, and Auditory awareness.
Sensory tubs encourage exploration, experimentation and messy play. You can include things that have different textures; smooth, rough, slimy, crunchy, slippery, cold/warm, lumpy with everyday things such as rice, unpoped corn, cooked spaghetti, dry split lentils, beans, shaving cream, water beads, jelly or gelatine.
Here are some great ones that were linked up to our recent BOO! Halloween Link Party
1. Halloween Sensory Bin by blogmemom
2. Halloween Sensory box by Dirt & Boogers
3. Witches Brew Pretend cooking by me, Adventures at home with Mum
4. and here is a great general one for kids of all ages including younger kids who still mouth objects rice-bubble-sensory-tub by Paint on the Ceiling


All you need to do is add some materials that are tactile, they might feel different, have different textures or temperatures, they could have different smells, and put some objects in the bin that children can sift through and find, or bury with some tools to explore with; measuring cups, tongs, spoons, small spades, play safe microscope or just encourage the use of their fingers.
Not only is this type of messy play great in enhances the sensory learning for little ones but it gives a good opportunity for vocalisation, turn taking and of course imagination.


The Brain Box:
I made a Gross looking Spaghetti Brain. It was successful as well! On first attempt I made a cooked pasta brain and attempted to set it in glue in the hope to use it as a table decoration but that was a big fat FAIL of an idea. I came up with another great idea, this one was more practical.
I cooked some spaghetti, soaked it in green and yellow food dye (the yellow adds a bit of brightness to the green). Once the colour had stuck, I drained the spaghetti and then placed it in a bowl. But first I put a circular piece of baking paper in the bottom of my bowl so that the brain would slide out easily. Don't forget this crucial part otherwise you could be digging your brain out before the kids get to see it.
 

I mixed up some Red Gelatin. You could use jelly but Gelatine in much more rubbery, it sets firmer and withstands room temperature for longer than jelly. In play, I use gelatine over jelly for that reason, it lasts longer and is more pliable with a smooth rubbery feel.
After I packed and pressed the Spaghetti into the bowl I mixed up the gelatine and poured it in, I would have used a litre but you should use enough so that you can see it at the top of your spaghetti (so that all the spaghetti will be set in the gelatin and held together).  I set it in the fridge for a few days until the party.
And this was the result;


It worked pretty well, i used a butter knife just to separate the gelatine off the walls of the bowl and with a firm hand wiggled the brain around in the bowl until I felt it had all separated in one piece. Tipped it out upside down in the sensory tub and Voila. Brains to play with.
In this tub I surrounded it with water beads and plastic eye balls.
If your child Loves water beads like we do, check out my previous posts using Water beads...

The kids enjoyed it, poking at it initially. It wasn't long before there were some plastic rats hanging out of the brain and then there was some imaginary cooking and some digging.
This was the wet box, the water beads remain slippery and cold while the brain was slimy and smooth and warmed as it got broken apart. The water beads could be crushed and squished or bounced around or collected in a bucket. This was the hands on messy tub.

The Pumpkin Seed Box:


This one contained Orange Split lentils, dyed Purple Rice and Yellow unpopped corn. This sensory box was the dry one with lots of different textures. There were some measuring cups and some small pumpkin head buckets so that the children could scatter the 'pumpkin seeds', using hand eye coordination, tracking skills, visual attention and encouraging motor skills through scooping, pouring, measuring, burying, sifting and rattling the seeds around.

There were small Halloween plastic party favours in it as well that could be found under the grains or buried. For visual stimulation I kept the materials pale orange, yellow and light purple so that the bright green, Orange and black creepy crawlies and Halloween things stood out.


The Verdict:
By the end of the afternoon the 2 Sensory bins got mixed around, and there were some great pretend cooking games using the Halloween buckets. One of the 5 year old boys who attended the party mixed up a good brew with some brains, some water beads, bugs, rats, bats, eye balls, creepy crawlies and pumpkin seeds. A bit of everything! 
Dimples pretended to taste the devilish dinner saying "yum yum" and licking his lips.
Messy play is definitly always a hit with young children. The kids ranged in age from 1 to 9 yrs old, and each one inspected  and messed around in the tables at least once, but it was the 3 yr olds who stuck with it and enjoyed it the most :)

The Sensory trays at the end of the evening. All messed up :)
Happy Adventures


Boo! A Halloween Linky

Mixing prime colours

Colour Exploration Stage 2: Mixing Prime Colours.


Dimples has known his colours for a while now, his lights and darks and all the colours in between!
I guess the next thing is to learn how colours mix together.

This is a Clean and Easy Lesson in Colour mixing for children of all ages. All you need are your Prime colour in food colouring, shaving foam or hair Mouse and some seal locked sandwich bags.

    RED                              YELLOW                                BLUE  

I stuck a small Coloured sticker on the plastic bags to help the learning process so that after the mixing was complete Dimples could see which bags started with what colours. 

What you will need

We did our Secondary Colours; Red/Yellow,  Yellow/Blue,  Blue/Red & I did an unmarked one so that Dimples could mix his own colour, knowing that he would choose all 3 prime colours.

First squirt your shaving cream in down the centre, leave small gaps on either side so your colours can get right in.  Do not over fill it, you want to be able to seal shut your bag easily without getting shaving cream into the sealing lock grooves. If this happens you could end up with an explosion of food colour and shaving cream all over your child's face, then it will be neither a clean nor an easy lesson in colour mixing.


Dimples makes green as the Red and Blue bag waits.

That's it! Seal it closed and one by one let your child mix the colours together. It was a success, Dimples was so enthusiastic as he mixed and mushed the bag around saying "I can see a bit of ..... Green! It made green mama"


Our mixed colours, showing what Prime colour was added to begin with.
 
Not only did Dimples watch and learn colour theory but he got a work out mixing the shaving cream. This is a great activity to strengthen the muscles needed for writing with all the pushing, scrunching, grabbing, pinching, squeezing and moulding. The shaving cream in the bag feels great as well, like a fluffy pillow.


The experimental mixing bag turned out into a light baby poo brown. I didn't get a photo but mid way through mixing it looks delicious! Not kidding, it looked like a rainbow paddle pop . So from a rainbow paddle pop to baby poo brown Dimples learnt that some colours mix well and some not so well.


The rainbow paddlepop colour with all 3 colours.

That turned baby pop brown!?

It was an interesting experiment and he loved it. We had a great discussion about colour, how there is only 3 prime colours and we went through the house pointing out colours as Dimples thought about what colours would be used to make it.

Happy Adventures

LinkWithin

Related Posts Plugin for WordPress, Blogger...